Each finalist qualified or received byes for our big $5,000 cash tournament next year!
Our events for May are down below, we have 3 weekends of CSQs and we also have our 3 year anniversary party happening! Contact us to preregister for any of the following events!
Saturday May 4th - 3 Year Anniversary BBQ & Open House/Draft Weekend
Today I’ll be talking about the cards from War of the Spark most likely to make an impact in Modern and Legacy. Why should you listen to me? Well, feast your eyes on this impressive list of my Magic-related accomplishments:
Zero GP Top 8s.
Zero Pro Tours attended.
Zero MTGO accounts.
How can you possibly afford to overlook such exemplary credentials. I’ll be going over the cards sure to see play either due to power level or because they’re upgrades to existing cards, the cards with fringe applications or which are worth testing, and the cards likely to find their way into sideboards.
Let’s get this out of the way: Blast Zone is the best card in the set by far. Engineered Explosives is a powerful effect and putting it on a land creates a low opportunity cost. It immediately slots into a ton of Modern and Legacy decks, notably Amulet Titan, Lands, and Tron; decks which can search for it and have a lot of mana with which to charge it up. Unlike EE, it enters with a counter on it, so it can’t destroy 0 CMC permanents (unless you’re running Turbo Depths). While the opportunity cost is lower, it can be slower and cost more mana to activate at counts higher than 1. EE usually doesn’t go past 3 mana; the table below shows the mana investment for playing + activating Blast Zone vs. EE.
Card
Mana Needed to Play + Activate
0 CMC
1 CMC
2 CMC
3 CMC
Blast Zone
N/A
3 mana
5 mana
7 mana
Engineered Explosives
2 mana
3 mana
4 mana
5 mana
There are also some other minor differences between Blast Zone and EE:
Blast Zone, being a land, can’t be countered.
EE can be played preemptively to fight Blood Moon. Blast Zone can never destroy Blood Moon.
If you’re not ready or able to activate it immediately, Blast Zone gets taken out by land hate (Field of Ruin, Ghost Quarter, Wasteland), but EE gets taken out by artifact hate (Abrade, Assassin’s Trophy, Nature’s Claim).
Ultimately, I think decks that are already playing EE will continue to do so and will play Blast Zone in addition, but Blast Zone will go into a lot of decks that would not otherwise run EE.
Liliana’s Triumph is a strict upgrade to Diabolic Edict in Legacy and a new addition to Modern. It will definitely see play in black midrange and control decks like The Rock, Grixis and Esper. Importantly, it’s instant-speed removal that kills both Death’s Shadow and Gurmag Angler, and it kills a slew of other large creatures such as Thing in the Ice.
The discard effect is relevant as well since the decks it goes in are often playing Liliana planeswalkers.
Finale of Devastation and Neoform are new additions to the long line of from-the-library-to-the-battlefield creature tutors. They are each surefire inclusions in Modern Devoted Druid shells while being powerful enough to have applications elsewhere. Some notable details:
Finale of Devastation has the pump effect, which will usually be irrelevant, but with infinite mana (a la Devoted Druid) it acts as a win condition in and of itself, although infinite mana + a creature tutor should already get you the win.
Neoform, unlike Eldritch Evolution, doesn’t exile itself. This means you can tutor for a card like Eternal Witness and get it back. It’s also the cheapest we’ve ever seen this effect (debatably, next to Green Sun’s Zenith; depends on what you want to get). However, it’s also the most restrictive, only able to get 1 CMC higher creatures.
Karn has some big implications. It’s a colorless, one-sided Stony Silence, which means non-white decks and artifact-based decks can play it (although 4 mana is two times slower). Its +1 initially seems to be a fairly marginal effect, until you realize you can use it on your opponents 0 CMC artifacts to destroy them (artifacts like Chalice of the Void). Finally, its -2 lets you partially play pre-sideboarded.
Then there’s the combo of Karn + Mycosynth Lattice: Lattice turns all of your opponent’s lands into artifacts. With Karn in play, your opponents can’t tap their lands for mana. Karn’s -2 fetches Lattice out of your sideboard, making Karn a combo with himself. How good this is is uncertain. You need 4 + 6 mana and a neutral to good board state, but if you have those then Karn wins the game by himself. This is far too slow for Legacy and I’m guessing it’s too slow for Modern as well, but it could have legs there.
Saheeli isworse cost-to-effect-wise than Young Pyromancer and Monastery Mentor, but since it’s a planeswalker, it’s much harder to kill. Additionally, the -2 is not irrelevant. For example, imagine temporarily turning a 1/1 servo into a Gurmag Angler. This will also be the first time this effect can be run in mono blue.
Davriel is an excellent addition to Modern 8 rack, soon to be known as 12 rack (maybe). It pulls double-duty as both a discard and rack effect, and is hard to remove especially when it sits behind Ensnaring Bridge. It’s also possible it could show up in control decks in Modern and Legacy since it’s a built-in 3-for-1 and a win con.
The five cards above represent more medium effects. Angrath’s Rampage is certainly versatile, but sorcery-speed and lack of choice hurt it a lot. Modern artifact-based decks tend to be go wide which makes the sacrifice ineffective, so I think it will be more useful in Legacy where artifacts are more lonesome, in something like Grixis control. Despark has exactly one home: In Modern BWx sideboards as a means to combat decks like Tron. Dovin’s Veto is a strict upgrade to Negate in decks that can afford to pay the white mana. It most likely slots into Modern UW control and possibly Ad Nauseum. Return to Nature is a strict upgrade to Naturalize, although as far as graveyard hate goes the effect is middling. Tyrant’s Scorn is a mashed together Smother/Unsummon. It can kill most threats and sort of deals with Gurmag Angler. It can also bounce your own Snapcaster to re-buy better spells. If it sees play anywhere it will be in UB control decks.
D&T players all over are excited for Tomik. I hate to disappoint you but he’s just okay. That’s not to say that Tomik is bad, but Lands is not a difficult matchup for D&T and his effect isn’t one that will come up much. Modern doesn’t have enough of the effects that Tomik stops so I imagine he’ll stick to Legacy. I do like Tomik better than cards like Serra Avenger. While it’s possible that Tomik makes the cut, he’s not an amazing upgrade by any means.
Far more interesting to me is Dovin. He’s a taxer who’s harder to kill than Thalia, who also effects decks like Painter and can fog threats for a significant amount of time. In Modern, he fights numerous aggro decks like Burn and Infect while also being decent against control. The 3 CMC may wind up being too slow, but the effect is solid. Interestingly, like Saheeli, he can be played in mono blue which I hope leads to mono blue tax brews.
Both of these make the ever-lengthening list of Ancestral Vision/Living End/Restore Balance enablers. Finale of Promise may provide the redundancy that Electrodominance needed to be a viable deck. Much has been made of Finale’s ability to cast 3 spells at once to enable Arclight Phoenix, but that is a poor use of resources. The Phoenix decks are already good at cycling through cantrips, whereas Finale can be stuck in hand.
While Dreadhorde Arcanistmight be good, attack triggers always look better than they play. First, the creature enters and has no effect, then has to survive a turn, then has to be able to attack with a relevant, legal spell in the graveyard, and finally not die to blocks. That’s a lot to ask. Snapcaster this is not. Out of curiosity, I did a search for the creatures in Modern with an attack trigger where the ability was the selling point and here’s the list of good ones I found:
Geist of Saint Traft
And that’s it.
BRING ON THE JANK
In this section, I’ll highlight new cards that seem too inefficient or vulnerable to be competitive, but which are powerful enough and have good enough interactions that they could be competitive.
Why It’s Good: Teferi restricts the timing of your opponent’s spells to sorcery-speed, which means they can’t cast anything through Possibility Storm or Knowledge Pool, locking them out of playing anything for the rest of the game.
Why It’s Bad: Possibility Storm and Knowledge Pool are expensive and do nothing without Teferi on the battlefield. Teferi has to be played out ahead of time and is vulnerable.
Why It’s Good: Vraska + Walking Ballista with 2 or more counters + give Ballista deathtouch = Infinite damage.
Why It’s Bad: Vraska doesn’t do much on her own and you have to pay 4 mana for each of them, which means splitting the cards over two turns and leaving yourself vulnerable. Then on top of that you need a 3rd card to give Ballista deathtouch.
Why It’s Good: Combine these two to build your own Armageddon. If you cast Ugin’s Conjurant for 0 while Celestial Kirin is on the battlefield all lands are destroyed.
Why It’s Bad: Kirin costs 4 mana and you have to be ahead on board for this to be good. Additionally, Kirin dies to basically every removal spell. While you do still have priority to cast Conjurant after Kirin resolves, you may not have drawn Conjurant at that time. Ultimately feels too cute to me.
Why They’re Good: The static abilities of both walkers are good and can be combined with other cards for powerful synergies. Ashiok stops fetchlands and can be paired with Maralen of the Mornsong. Narset combines with Geier Reach Sanitarium to deny your opponent card draw or combines with wheel effects like Dark Deal to shred their hand. Additionally, the minus abilities of both walkers are good. Of these “jank” cards, these two are the ones I think have the most potential.
Why They’re Bad: These effects have already existed in Modern on Leonin Arbiter and Spirit of the Labyrinth respectively and have proven not to be good enough. To be fair, these are planeswalkers instead of creatures and are in different colors, but the history of evidence doesn’t support a winning record.
Why It’s Good: If you cast Awakening of Vitu-Ghazi on Inkmoth Nexus, then animate the Inkmoth, it will be a 10/10 with Infect = 1 hit kill.
Why It’s Bad: Awakening of Vitu-Ghazi costs 5 mana and leaves your Inkmoth vulnerable since it’s always a creature. If you want to cast and attack in the same turn you will need 6 mana.
And Then There Was One
Finally, I want to discuss a card that I didn’t feel fit under the previous sections.
The new Gideon is very similar to Gideon of the Trials, which is a card that almost shows up in Modern and Legacy. The rate is certainly good enough. Both are 3 mana 4/4s. Gideon of the Trials +1 fogs a permanent, while Blackblade’s grants lifelink, which is kind of like a fog. The main difference between the two has to do with proactivity. Gideon of the Trials had to choose between fogging or attacking. The Platinum Angel-esque ability was largely irrelevant unless you were playing against Legacy Storm.
Gideon Blackblade is always a creature on your turn, which makes him more vulnerable, but also means you can use the +1 in addition to attacking. The lifelink will help to get ahead of aggressive decks more so than a fog. The -6, while not great, is also a proactive effect which will have more impact than Trials second 0 ability. Note that unlike previous Gideon planeswalkers, Blackblade does not intrinsically have indestructible.
I think Blackblade will go into the same decks that Trials does, but it’s a matter of whether either one is good enough to see play.
I am new to writing magic articles so I figured I would introduce myself. My name is Mike Laursen and I am a Villain of Modern.
I plot and scheme to whir my plans into motion while at the same time being friendly to you across the table. Every turn I chip away at your game plan. I am a builder of prisons and my end goal it to lock you out from playing the game you came to play. I play Whir Prison.
Whew. Now that we have that out of the way, lets discuss how I put my plans into motion.
The goal of the deck is to play a couple artifacts that you use to shut down your opponents’ deck and prevent them from being able to beat you. Then you kill them by milling them out with Ipnu Rivulet + Crucible of Worlds or kill them at 2 damage per turn with Pyrite Spellbomb + Academy Ruins. Sounds easy but each deck you play against has a different plan of attack and therefore, different cards you need to play to beat them.
Let’s give some examples of some of the top tier Modern decks and what pieces Whir needs to beat them.
Izzet Phoenix:
The main goal of this deck is to beat you to death with a couple Archlight Phoenixes or flipped Thing in the Ice in the first 5 turns. They have a lot of cantrips and can dig through their deck quickly. Thankfully most of their spells cost 1 mana. This can make a Chalice of the Void on 1 be a tough hurdle for their deck as you are shutting down all their draw power. Most versions of the deck also rely on creatures to get the kill on their opponent. This is where Ensnaring Bridge shines.
The Game 1 lockout:
Ensnaring Bridge
Chalice of the Void on 1
Chalice of the Void on 2 or a couple Welding Jars to keep the bridge and first chalice alive
Game 2-3:
This deck doesn’t really change that much to beat us. The only scary cards from their SB are Shatterstorm and Surgical Extraction. Thankfully our Chalice on 1 plan fights against the Surgical. The Shatterstorm is another story. We must use Unmoored Ego and name Shatterstorm or hope to hit it with a Jesters Cap. Chandra is sometimes also in the SB so it is a good idea to keep at least 1 Sorcerous Spyglass in.
The Game 2-3 Lockout:
Ensnaring Bridge
Chalice of the Void on 1
Chalice of the Void on 2 or a couple Welding Jars to keep the bridge and first chalice alive
Unmoored Ego naming Shatterstorm
Sorcerous Spyglass for Chandra if they are running it
Dredge:
The main goal of this deck is to utilize the Dredge mechanic to get as many cards in their graveyard as fast as possible and get the creatures back onto the battlefield. The deck banks on getting Narcomeba or Bloodghasts into the yard to help pull back Prized Amalgam in the early turns, then finish you off with Conflagrate and Creeping Chill if needed. The deck can be very fast if the right cards get dredged but it is still at its core a creature deck. Ensnaring bridge shines here. Your life total can get low fast but as long as you keep it above 12 by the time your bridge comes down, you can fade being killed by the Creeping Chills.
The Game 1 lockout:
Ensnaring Bridge
Witchbane Orb
Inventors' Fair (if your life goes below Creeping Chill loss)
Game 2-3:
Aside from adding some artifact hate, the deck cannot change that much to fight us. This is where Gaftdiggers cage shines though. Keeping the creatures in the graveyard and the second half of Ancient Grudge from being used is a very good boon.
The Game 2-3 Lockout:
Ensnaring Bridge
Witchbane Orb
Inventors' Fair (if your life goes below Creeping Chill loss)
Gaftdiggers Cage
Welding Jar to fight through the artifact hate
Tron:
This one can be a struggle as the deck ramps up to 7 mana from 3 lands by turn 3 to cast Karn Liberated. The Oblivion stone can also be a problem as our non-land permanents are important to remain in play to win. All hope is not lost to the hero of Mirrodin (pfft. Heroes. Am I right?) as we have the tools to not only lock them out, but to keep them from casting their most powerful spells. This is all due to the card Damping Sphere. It stops them from tapping the urza lands for more than 1 mana each. This card is the only reason we can fight the Tron deck. The next piece is a combo of two cards. Crucible of Worlds and Tectonic Edge. Having the Sphere, Crucible, and Tech Edge will completely lock out Tron and is our only route to victory against them. Due to those three being a 1 of in the deck, it is important to utilize our Whir of Invention and Toleria West to find them.
The Game 1 lockout:
Tectonic Edge
Damping Sphere
Crucible of Worlds
Sorcerous Spyglass Naming Oblivion stone if they get above 4 mana
Ensnaring bridge and Sorcerous Spyglass for Walking Ballista if they are playing it.
Game 2-3:
Sideboards in this game are not too bad. They bring in Nature’s Claim, Relic of Progenitus, Surgical Extraction, and Thought-Knot Seer. Chalice of the Void on 1 does a spectacular job at shutting most of this deck down in the early game and their SB cards. We have the same lockout plan against them, but we need to also get Chalice of the Void on 1 to ensure they don’t break out of our lock.
The Game 2-3 Lockout:
Tectonic Edge
Damping Sphere
Crucible of Worlds
Chalice of the Void on 1
Sorcerous Spyglass Naming Oblivion stone if they get above 4 mana
Ensnaring bridge and Sorcerous Spyglass for Walking Ballista if they are playing it.
All of these heroes of Modern think they can stop us? We have been hiding in the shadows for too long. It is time for our plans to proceed and the multiverse to finally bend to our wills.
Each finalist qualified or received byes for our big $5,000 cash tournament next year!
Our events for April are down below, we have 3 weekends of CSQs and we also have War of the Spark prerelease happening the last weekend of April! Contact us to preregister for any of the following events!
Saturday April 6th - Collector Series Qualifier: Modern Cash Event
This is my first time submitting something to Collector Legion, but my buddy Grim asked me to write something up and, loving the SoCal scene as I do, I was happy to oblige!
I also recently started writing again for CoolStuffInc, so I’ll go ahead and give you the same intro I did there: my name is Frank and I’ve been making Magic content for over a decade now. I’ve written for most of the major sites out there at one time or another, as well as having both a Pro Tour and Grand Prix Top 8 to my name. My content typically focuses on brews - specifically trying and finding the more obscure cards and decklists that tend to go against the grain - and as a full time Twitch streamer who accepts a lot of deck critiques, I’m in a fortunate position to have a lot of new ideas presented to me.
Today I want to discuss Modern, which has been a format I’ve had some success with. From a popular column entitled Modern Monday that ran for about seven years, to the Oath of the Gatewatch Pro Tour where I played Eldrazi, Modern is a format that’s very close to my heart, both for its diversity and the feeling that you can pretty much do anything you want within it.
That is...until the cards we’re going to talk about today come into play. What follows are the six biggest “villains” of the Modern format, in my opinion. Of course this is completely subjective, but I wanted to pick out and talk about some of the most oppressive cards in the format. Cards that are innocuous enough to be dealt with, and can be easy to play around, but if you don’t...some decks might as well give up on the spot. (These are in no particular order.)
Blood Moon
Make no mistake, this one is likely as close to the number one spot as you can get...if I were to number these. With entire decks in Modern that revolve around what lands you have in play, Blood Moon can single-handedly shut down entire archetypes, but that’s not even the worst of it. Many decks run fewer than five basic lands in Modern, meaning if you’re maindecking your Blood Moons, you’re usually going to steal a few wins from unprepared opponents.
Even prepared opponents will end up falling prey the Moon every now and then, as it’s simply a must-answer card for a good number of strategies. Even the decks that can play around it, by fetching out their basics first, are still playing with suboptimal lands than they wouldn’t be if they were able to casually search out their shock lands. Blood Moon is definitely one of the biggest Modern boogeymen around, and for good reason. When you play against someone you might suspect has Blood Moons in their deck, you change your entire play style from turn one.
Ensnaring Bridge
This is one of my least favorite cards in Modern. If you don’t happen to have something like Abrupt Decay, Assassin’s Trophy, Maelstrom Pulse, or one of any number of B/G “destroy any permanent” cards (actually, I think that’s about all of them…) in your deck, then you might literally have to scoop. When any deck running Ensnaring Bridge is able to manipulate their hand in such a way as to invalidate all of your creatures, it can be pretty demoralizing.
At least when someone casts something like Supreme Verdict or Wrath of God you’re able to rebuild eventually. At least those still let your creature lands attack. Ensnaring Bridge is a card you simply have to deal with, or you might as well concede. It was also a card that didn’t see a ton of play in the early days of Modern, but now...any deck that unload cheap artifacts has four of these bad boys, ready to shut down even your 1/1 creatures. I’ve definitely won some games by sneaking in with a Noble Hierarch and her exalted trigger...but it ain’t pretty.
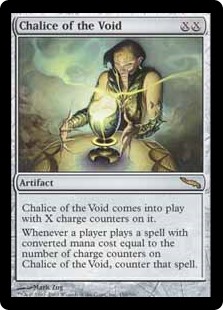
Chalice of the Void
Chalice of the Void is less dominating than the other two previous cards on the list, but not by much. There are a lot of decks in Modern that simply fold to a Chalice on two: Burn, Infect, Lantern, and Death’s Shadow are a handful. These decks are comprised of so many one-mana spells, that a chalice for two might as well invalidate 70% of their deck. It’s kind of insane. Luckily, the decks that aren’t impacted by Chalice too heavily are usually fine, with the artifact merely shutting off a path to Exile or a Fatal Push, or some hand disruption.
In case you weren’t aware though, Bogles, U/R Phoenix, and Death’s Shadow are all pretty heavily impacted by the card, and those were the Top 5 slots at Grand Prix Tampa. Each deck had 24, 29, and 26 one-mana cards in their main decks, respectively. The 6th place deck was Lantern Control, with 29 one-drops. The 7th place deck was Tron, with 20 one-drops. The 8th place deck was U/R Phoenix again. That’s the entire Top 8 of Grand Prix Tampa, where nearly 50% of every deck would be effectively shut off by Chalice of the Void. That’s a powerful artifact that seems somewhat underplayed right now.
Leyline of Sanctity
Leyline of Sanctity is still less oppressive than the other cards on this list...I think...but it’s still hard at work shutting down entire archetypes. If you’re playing main deck Leylines, like Bogles was for a brief moment in time, not only are you managing to shut down the entire burn deck you may come across, you’re also invalidating any sacrifice effects on cards like Liliana of the Veil, as well as any targeted hand disruption. A turn zero Leyline against something like Lantern shuts off about 15 cards in their main deck, which is a good 25%.
While Leyline of Sanctity is mainly a sideboard card in Modern, similar to things like Chalice of the Void, playing it in your main deck can be extremely valuable. Even if you shut off a single Thoughtseize, you’ve already gotten a one-for-one from it, and that’s likely the worst possible scenario; often times they will have drawn more than one card that targets you in a single game.
Trinisphere
Trinisphere is the card I have the least experience with, especially in Modern, but it seems to be showing up more and more in green “control” decks that pack a ton of land destruction and denial. Often filling the same roll as Chalice on one, when all of your one-mana cards cost three mana, you might as well be playing a different game than you sat down to. Both Chalice and Trinisphere can be built around, but in different ways. Conversely, Chalice is often only going to affect cards that cost one or two mana, where as Trinisphere is going to affect cards that cost zero, one, and two mana, which is a pretty big deal.
Again, if you look at all the decks Chalice of the Void affects, you can easily see why Trinisphere would have a similarly oppressive effect on them. I would not be surprised to see Trinisphere pop up in more decks in the future, so long as the decks themselves aren’t hindered by their own sphere’s restrictions.
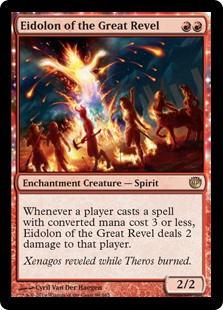
Eidolon of the Great Revel
Alongside Ensnaring Bridge, no card enrages me on the list more than this one. More than just an ordinary creature, this is as much of an obnoxious “enchantment” as any of the other cards on the list. The problem with Eidolon is that, even though you likely want to kill it anyway, if forces you to kill it first, because allowing it to survive for longer than it should only amounts to further attacks and further triggers, and that’s the last thing you need against the burn deck. So while you’d like to keep counterspell mana up, while you’d like to bolster your life total with something like Kitchen Finks or Knight of Autumn, the thing you have to do is get rid of this.
Eidolon of the Great Revel makes it so instead of Knight of Autumn gaining you four life, you simply lose two life. It essentially “deals” you six damage and wholeheartedly earns its double red casting cost. This card has a home in one archetype in Modern, and it is likely the strongest, most oppressive card in the deck. In a situation where you don’t actually have removal for this, instead only having spells in your hand that will trigger it, you might as well go to game two.
These have been my Top 6 most oppressive villains in Modern: single cards that, on their own, kind of force you to deal with them before the game can proceed in any meaningful way. I’d love to hear your thoughts of what your own list might look like! Thanks for reading, all, and I’ll see you next time!
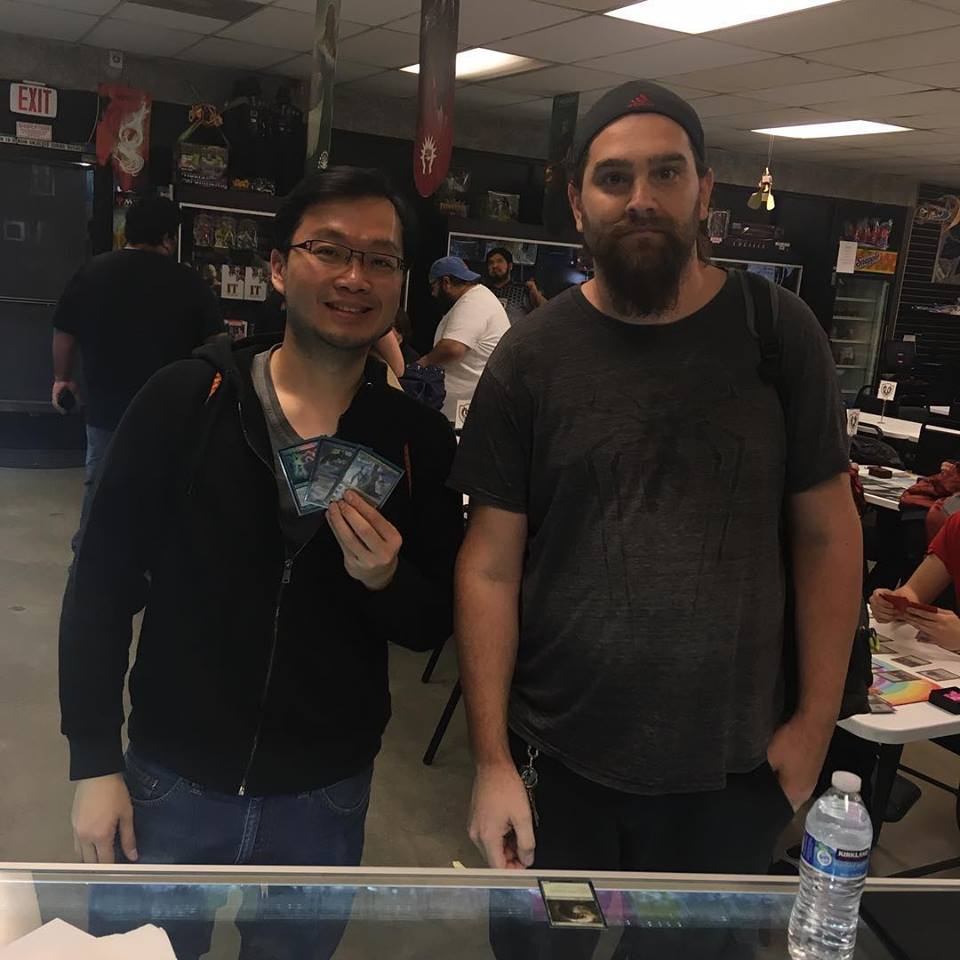
Here we are, 0-3 in a PPTQ/Invitational/GP again with no chance of making top 8. What is there left to do but continue playing? This feeling is shared by all magic players and extends even down to FNMs, Game Days, and staples events at your local game store. The feeling of not performing well today sinks in, we find reasonable excuses on why we are here: bad draws, a bad match up here, too many lands or not enough to curve out, to stay in the game. It's hard to be happy and smile being down in the lower tables while your friends are undefeated and crushing it, but it's important to stick it out and do so.
I frequently find myself in the spotlight when it comes to posting pictures of events and making sure friends who are doing well get noticed. I often point out their accomplishments during the event, sit down and talk to them about how their rounds are going. When asked how I'm doing in the event I avoid any negative energy, instead I say things like “It's fine, I'll come around” and “What about you, you're crushing it!” In a position where I find myself not pulling ahead of an event, I like to default myself into a supportive mentality. Magic does have some amount of variance that plays a factor in our results and it's important to not let it get you down, so, why not make the most of a bad situation.
I hope some people outside of my Local Game Store have seen me in action, as I have seen it in them as well. This mood switch when things aren't going well for you can help elevate friends and players around you staying positive. Who you are at an event goes further than how positive your results are. Next time you find yourself down and not happy with how an event is going, find someone who is doing well offer to get them food if they haven't had time, get drinks to help keep them refreshed, and most importantly keep them HYPED. A pat on the back or verbal encouragement go a longer way than we believe, and standing right next to your friends as they make difficult plays helps show them they’re not alone.
Next time you’re, let’s say, “not doing so well” in an event, take a deep breath, look around the room and show someone they too aren’t alone, and trust me, it feels great. The moment you see a friend take a game winning play in the finals or top deck that one card they need to recover? Those moments are what we should strive to see, do you know why? It’s simple, when it’s your turn to be in that game winning position it's going to feel great and open your eyes to how many players care for you.
For those of you that travel to GPs wait, sorry MagicFests.... playing in a room of over two thousand strange faces becomes less foreign when you see someone from home. I’m not talking about another player from your local game store, I'm talking about a grinder, someone from a playful rivalry shop, because the support I am talking about isn't just meant for your teammates and close friends it's for anyone out there in the trenches with you, that player you always see at a PPTQ (RIP) whose name you don’t know. Keeping each other's spirits high brings a different excitement to these events, so why not spread it?
I've had the idea of writing this article for some time, but I never knew what its main purpose would be, how do I end it? What do I say to close it off? Well, I found it and it’s simple. Thank You. Thank you for making events bearable when things aren’t looking up for others. Thank you for winning, and making the almost two-hour drive worth it, for your hard work paying off for me to hype you with. Thank you for dinners after events to wind down and become friends. Thank you for letting me get in your face with a camera and post pictures of you without permission, for letting me in your card shops and be my loud self with my crew, we really do try to keep things low volume, to every player I have sat across from, and those who stand behind me and tell me how I misplayed. Those who’ve I traveled with, let me sleep at their apartment, shared hotels and Airbnb's. I don’t think I say Thank you enough as I should.
I’m not picking that deck up, I don’t want to end up in the draw bracket playing mirrors all day, control decks always go to time. I’ve heard this time and time again as a deterrent for not playing a control deck at a big tournament. It makes sense from the outside looking in. Both players are playing a deck with a few win conditions that are set up to play a very, very long game of magic. And when they play against each other, you’re talking about a game that will go well past something you might be used to. The truth is, understanding how the decks play out, what stage of the game you are in, and what cards are actually important make the matchup move at a much quicker pace of play.
In order to understand what kinds of cards are important in a control mirror. You have to understand how the control mirror plays out. Reid Duke’s approach to the control mirror is to divide it into two stages. A setup stage where both players try make land drops and sculpt their hand, and a active stage where players fight over a few key threats. The setup stage involves players playing lands and saying go. Some cheap card filtering or card draw spells are cast, but its with the goal of finding more lands. The more land drops you can make, the better equipped you will be to fight an inevitable counter war. The game transitions to the active stage when one player tries to start forcing through threats. Eventually someone will either miss a land drop or become in danger of decking themselves and will be forced to start making proactive plays. The active stage is all about using the resources you accumulated in the set up stage to battle over haymakers. Someone attempts to resolve a win condition and the other player will start a counter war or cast their own threat to keep up. This continues until someone loses a counter fight or the game snowballs too far in one players favor.
The most difficult thing about a control mirror is that whoever “blinks first” is at a disadvantage. If you tap out for a planeswalker, and your opponent counters it, then untaps and drops their own walker, your very far behind. You now have to spend mana on your turn to deal with their threat and your back in the same position: tapped out on your own turn and your opponent has free reign again. One way to avoid this scenario is to build up enough land drops that you can deploy a threat and cast multiple counterspells, all in the same turn. This is why land drops are so important. Teferi, Hero of Dominaria costs five mana. Playing Teferi while holding up disallow costs eight mana, doing it with two costs 11, etc. The more counterspells are involved the more land drops your going to need to fight a counter war.
Another way to get around tapping out on your turn, is to operate at instant speed. It’s risky to put your “shields down” during your main phase because it lets your opponent resolve their expensive sorcery speed cards. Playing spells on their end step circumvents this because if your opponent fights over your spells during their end step, they will be tapped out during your next main phase. For example you and your opponent both have 7 lands, during their end step you cast a Sphinx’s Revelation for 4, tapping out, and your opponent Dissolves it. Then you untap, play a land and cast Jace, Architect of Thought with two negates in your hand. By playing your Revelation in their end step, you’ve made it so your opponent has less mana to work with to prevent your Jace from resolving. You get to cast a powerful spell, but without “blinking first.”
Sometimes control decks are short on actual hard counterspells. Usually this happens in standard where spot removal is more efficient that counterspells. Control decks in standard will usually pack 4 of whatever the best version of Cancel is plus a couple Negates and Essence Scatters. When control decks are built this way it is important to understand line up theory. Line up theory is all about using your answers in such a way to best deal with your opponents threats. If your limited deck has two removal spells, a Lightning Bolt and a Doom Blade, and your opponents deck has a Serra Angel in it. You can not use the Doom Blade on a creature other than Serra Angel because its your only answer. You are free to use the Lightning Bolt on whatever you want because it doesn’t need to be reserved for the Serra Angel.
Line up theory matters more in the control mirror before players have access to their sideboards, when the number of counterspells is low. If you only have 6 counterspells it becomes very important to pick your battles correctly. What you should be fighting over with your counterspells varies by a wide margin depending on the decks and the game. An example of the use of line up theory was from Carlos Ramao’s strategy when he won worlds in 2002. In the UB Psychatog mirror Carlos Ramao’s strategy was to only try to counter the win conditions, Upheaval and the eponymous Psychatog. He would allow all of the card draw to resolve and save his counterspells for the real threats. Even though had less resources at the end of the game, what he did have was more counterspells still left in his deck and that ended up being more important in the matchup.
Another clear example of how line up theory changes based on context is in game 1 of the finals of Pro Tour Kaladesh. In this game there is a turn where Carlos Romao casts a Torrential Gearhulk and Shota Yasooka lets it resolve. Romao uses his Hulk to cast Glimmer of Genius which Yasooka also declines to counter and then uses two Harnessed Lightnings to kill the Gearhulk. Later that game Romao casts a Harnessed Lighting on Yasooka’s Gearhulk and Yasooka protects it with a Negate. On the surface these exchange looks terrible for Shota. If you look at the first exchange from a card economy perspective, Carlos is up the two cards from his free Glimmer and Shota is down the two Lightnings he used to kill the Gearhulk. The exchange was a 4 for 1 in Romao’s favor. The second exchange is more about card quality. Romao’s Harnessed Lightning is one of many removal spells, while Shota’s Negate is one of precious few counterspells. Why would Shota trade one of his best cards, Negate for one of Romao’s worst, Harnessed Lightning? The answer is that Yasooka had fewer cards in his library. Because Yasooka was going to be the one to run out of cards in library before Carlos, he was forced to try to win the game with a Torrential Gearhulk. This means that he had to line up his cards in such a way to enact this plan even if it looks bad on the surface. The counterspells have to be saved to protect one of his four gearhulks and two Wandering Fumaroles because they are the only way he can deal twenty damage. This also means that he has to use otherwise useless Harnessed Lightnings on Carlo’s Gearhulk if Carlos is just going to target Glimmer of Genius with the Torrential trigger. Shota picked up the win in game one because he understood how the game had shifted, and that he needed to become the aggressor, even if it meant countering a removal spell.
While it is important to keep line up theory in mind, sideboarded games play out almost completely differently from game ones. Control mirrors are defined by the large number of useless removal spells and being careful with how you use your few cards that matter. Once players have access to their sideboard things change in a big way. Control sideboards are often packing backup win conditions and more counterspells, so players can be much more frivolous with counterspells and threats. Think about the earlier example of line up theory with the Doom Blade and the Serra Angel. Now imagine the Doom Blade player has sideboarded in two Plummets. Now the Doom Blade is free to just cast Doom Blade on turn two because they have more outs to Serra Angel in their deck. The same principle applies heavily to the control mirror. You’ve sided in some Negates so you don’t have to save your Cancel for a big endgame fight. When both players have 10 counterspells instead of 6 or 6 win conditions instead of 2 the plays are less restrictive.
Control mirrors are all about mana advantage, dead removal spells, and patience. When everything is simplified down to these ideas, you can see how the game speeds up a bit. Your turn in the early stages of the game consists of playing out a land, and then passing the turn. In my opinion, mirror matches became stigmatized because players like to get fancy and “go in the tank” in the early turns resulting in matches that end in a draw. Stay focused on on what matters early, and you can accelerate the game into the later stages where players start casting haymakers. Don’t get lost in the first 8 turns of the game, hit you land drops, operate in your opponent's end step if you can, and discard your removal to hand size. Stay out of the draw bracket and hold that unto that cancel as if your life depended on it.
“I hate playing the mirror, its so dumb.” “I can’t figure out this mirror, it’s all about luck.” “I don’t play the best deck because I don’t want to play the mirror all day.”
Chances are you’ve heard magic players complain about the difficulty of a mirror match. A lot of players like to get their advantage by picking a deck ahead of the metagame. But when you run into the mirror, all of those edges are thrown out the window. In the mirror match, your cards are the same, the only advantages you have are the quality of your draws and the quality of your gameplay. Knowing what cards are important, how to sequence your spells, and what role you are supposed to play when all the cards are the same are invaluable skills that most players would rather avoid than perfect.
There is not one secret to winning mirror matches. The best way to approach mirrors is to think about them in terms of aggro, control, and combo. Different heuristics apply to each type of deck’s mirror in terms of play and deckbuilding. Control decks have different priorities than aggro and combo decks. Going a level deeper, not all control, aggro, and combo decks play out in the same way. The strategies for winning a UW control mirror with Teferi are different than those used to win Abzan control mirrors with Elspeth, Sun’s Champion. In order to fully discuss different types of mirrors, this article will be part of a series. Part one will cover aggro decks. Aggro decks fall into two categories, red and non-red.
Red aggro mirrors are all about determining if you are ahead or behind. One of the oldest Magic strategies is determining “Who is the Beatdown.” In other words, who should be attacking and who should be controlling. In constructed, most of the time your role is clear; your aggro deck attacks, your control deck slows the game down. One deck will be favored if the game goes long. However, in the aggro mirror neither deck is designed to play a late game. But in every game, one player will be inevitably forced into a defensive position. One player simply won’t be able to win a race and it will become correct for them to play defensively.
Usually, the aggro player on the draw should try to play the control role. The tempo of being on the play gives that player an advantage in aggression, and the benefit of the extra card on the draw helps that player be more controlling. The good news about being forced to play defense with your aggro deck is that aggressive cards are good at trading with other aggressive cards. Damage spells can be pointed at creatures instead of at your opponent. For example, even though it’s found in aggro decks, Lightning Bolt is one of the best defensive cards ever printed. Generally, the creatures in red aggro decks are similarly sized, so combat is usually a lot of even trades. Goblin Guides can trade with Eidolon of the Great Revels and vice versa. The bad news is that after you trade off your resources, your aggro deck probably doesn’t have many ways to generate card advantage. Cards trade easily and for little mana, so this often means that aggro mirrors often come down to a topdeck war after both players exchange all of their cards very quickly. Because of this you sometimes see players choose to draw in aggro mirrors. When all cards are cheap, and just trade one for one, the benefit of an extra card is sometimes greater than the advantage of being on the play.
When playing the aggro mirror, you need to determine if you are “the beatdown” as soon as possible. Trying to switch roles at the wrong time is a death sentence. If you start the game attacking and realize you’re behind when you’re at 6, it might be too late to defend yourself. If you started blocking and usings burn spells on their creatures earlier, you might have more life to work with when the game starts to slow down. Similarly, if you play too conservatively in the early turns when you should be the beatdown you might give your opponent the time to get back into a game that you would have won easily. It is much smoother to start the game and end the game as the same role.
One of the easiest ways to break the red aggro mirror is to go slightly bigger than the stock list. Usually this means 4 mana threats that don’t trade 1 for 1 with a three damage burn spell. Examples of this include, the sideboard Thunderbreak Regents at Pro Tour Origins, Hazoret at Pro Tour Hour of Devastation, and Arc Sloggers during Mirrodin Standard. These cards let you take over the game after you trade resources. Because there are so few ways to generate card advantage, even if your big creature gets killed by two bolts that still a positive exchange for you. Your dragon died, but you would trade any single card for two bolts every time. When red mirrors become popular, it’s often correct to have answers that deal with the expensive threats and to save them for their mirror breaker. It is often correct to not cast your Soul-Scar Mage until you can use it to shrink a Hazoret to death. Exquisite Firecraft had to be saved since its the only card that can kill a Thunderbreak Regent 1 for 1.
You can’t include too many of these expensive cards because you still need to have a low enough curve to not get run over before you can cast your 4 or 5 drop. Hazoret is the best example of the diminishing returns on red 4+ drops. The red god is the best thing possible going on in a red mirror by a huge margin. Its virtually unkillable, it attacks immediately, and it can still close out games with its activated ability. The downside to overloading on expensive cards to go over the top in the Ramunap Red mirror was that you would have too many cards in hand and your Hazorets would never get online. Some expensive cards are powerful, but too many will make your deck too clunky to keep up with an aggro draw. Because of this, red sideboards often include a mix of some expensive threats and some cheap removal to help you cast them on a stable battlefield.
Other sideboard cards that excel in red mirrors are artifacts that gain life, such as Zuran Orb and Aethersphere Harvester, card advantage engines, like Outpost Siege, and some cheap 2 for 1s like Arc Trail or Hordeling Outburst. The lifegain cards are obviously powerful for winning races, but the card advantage is more contextual. Planeswalkers are often poor in red mirrors. Although it’s possible to take over a long game, in most cases your walker will just activate once, then get burned or attacked and die. Something like Outpost Siege is much more preferable. Your Koth or Chandra will die to anything, but nothing kills an enchantment in the red mirror! Similarly, cards that make tokens or divide damage are usually strong because two for ones are not plentiful. If your opponent spends more than one card dealing with a Hordeling Outburst or a Goblin Rabblemaster that’s a big win. The same is true if you can kill two cards with Arc Trail or Forked Bolt.
Non-red aggro mirrors play out slightly differently than their red counterparts. Tribal creature aggro decks, white weenie decks, and green stompy decks are all about tempo. The absence of burn spells means that it’s a lot harder to interact with a creature. Your mostly limited to trying to block if you want to protect your life total. Without the cheap removal of the red aggro decks, it’s much more difficult to catch up if you fall behind. If you get ahead it’s easy to leverage your tempo and stay ahead. Ways to get ahead on mana, cards that generate big tempo swings like Man O’ War, or cards that reward you for going wide like Glorious Anthem tend to dominate non-red aggro mirrors. Aether Vial and Llanowar Elves are classic examples of cards in white and green aggressive decks that let you cheat on mana. It’s very difficult to beat the mana advantage from these cards in the mirror on the draw. If your opponent can play two spells a turn before you can, they’ll often win because there is no one card you can play to stabilize. The reverse is also true. If you are on the draw with an Elf or a Vial, you can stop an aggressive start from your opponent by double spelling. Usually the best answer to one of these mana advantage cards is casting your own copy.
A good example of the importance of tempo swings in these types of mirrors was Dromoka’s Command in the Abzan Aggro mirror of Khans block standard. White aggressive decks usually have around four removal spells, but the command was on another level. Just used as a 2 mana Hunt the Weak it was very powerful. But it could also be used in more complex ways to break up combats. Tempo was crucial to the power level of Dromoka’s Command on any given board. It was difficult to cast profitably if you were behind on board. If you were the second person to cast a creature, you couldn’t cast a Drom Com if your opponent cast theirs to kill your creature. This meant that abzan aggro mirrors tended to snowball, because if you didn’t have a good board you couldn’t cast Dromoka’s Command, but your opponent could cast theirs.
Another way to break the non-red aggro mirror are payoffs for going wide. Examples of this include Always Watching, Lord of Atlantis, Master of Waves, and Ghalta, Primal Hunger. Ghalta and Master of Waves do not pump your team, but fill the same role of rewarding you for having a big team. Because there isn’t a lot of removal in these mirrors, creatures stick around, and your Lords and your Crusades will be more effective. This means that sometimes you might not want to offer to trade off creatures, even if it means skipping a combat step. If you have two Thalia’s Lieutenants in hand, you probably don’t want to attack with your 3/3 Champion of the Parish this turn if your opponent can double block. If you wait, you can attack with it as a 7/7 and force chump blocks instead. Similarly, if your mono-green opponent does not make a trade that otherwise looks good, they might be trying to build up a board with ten power to cast Ghalta.
Many players hate the aggro mirror, because games sometimes seem like a pure race that take no skill. “Two ships passing in the night” is a common expression for matchups like this. Many constructed aficionados feel this way because the aggro mirror uses lot of skills that you do not normally come up in constructed. The constant role assessment of the red aggro mirror and the wide battlefields of green and white aggro mirrors are difficult for players who mostly stick to control and combo archetypes. In constructed its so obvious who should be playing the aggro and control rolls, that many players are not equipped to handle when it is ambiguous. Wide battlefields are also a rarity in a lot of constructed matchups. Control and combo decks don't have tons of creatures and midrange decks play a even split of threats and removal, leading to games where the board is 1 or 2 threats at a time. If you can master these unique skills you can get a huge edge in aggro mirrors.